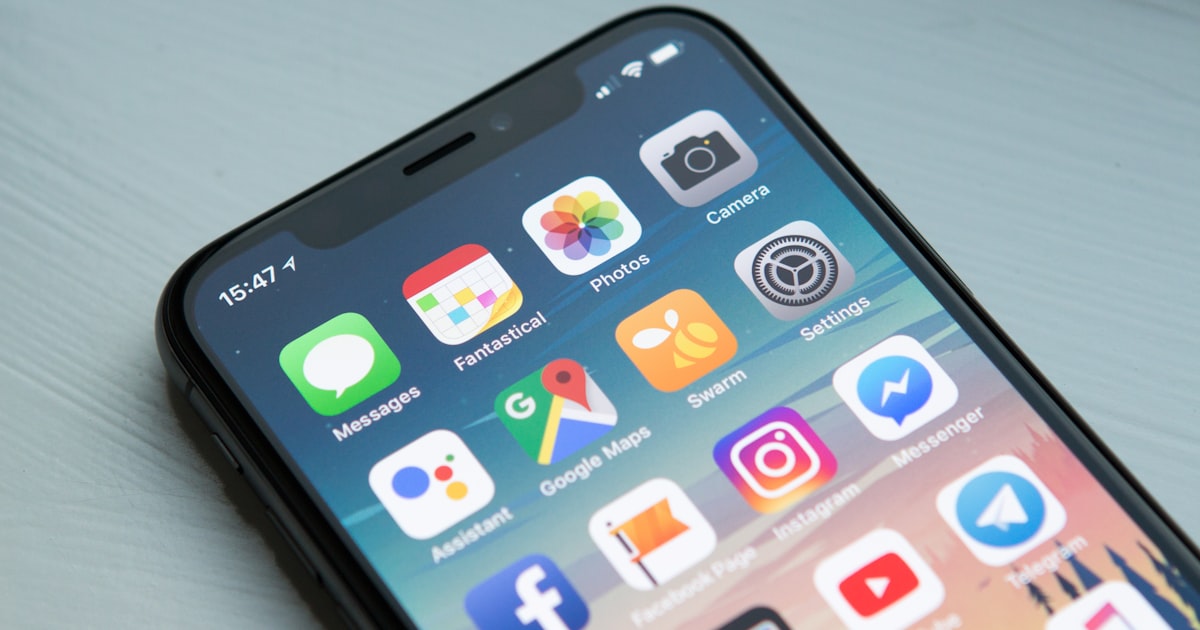
The cleanest app store screenshots start before you open any design tool — with a clean capture. That means a fixed clock, full signal and battery, and zero notification clutter in the status bar. On Android you turn on SysUI demo mode over adb before you capture; on iOS the marketing convention is a 9:41 clock with full bars, which the Simulator gives you automatically. Capture at the exact device resolution each store requires, keep the source files lossless, and save the framing and captions for afterward.
Why does a messy status bar quietly wreck a screenshot?
Here's a mistake I made with my first app, and I've seen plenty of other indie devs make it too. I took my store screenshots straight off my daily-driver phone. Battery at 14%. A little chat icon in the corner. The clock reading 3:47 on a Tuesday. Then I wondered why the whole listing looked so… homemade.
The status bar is tiny, but people read it. A half-empty battery and a stray notification icon tell a viewer, without a single word, that this is a snapshot of somebody's actual messy phone rather than a designed marketing asset. It reads amateur. And on a store page where you've got about three seconds to look credible, amateur costs you installs.
There's a reason every polished iPhone screenshot in the App Store shows the clock at 9:41. Apple set that time during the original iPhone keynote back in 2007 and has used it across its product shots ever since, so a 9:41 clock now reads as "this is a real product shot." You don't have to copy 9:41 exactly, but the principle holds: a fixed, tidy status bar looks intentional. A random one looks accidental.
So the first job isn't design. It's capture. Get a clean frame out of the device or the emulator, and everything you do after — framing, captions, backgrounds — sits on top of something that already looks professional.
How do you force a clean status bar on Android?

Android has a built-in trick for this called SysUI demo mode, and it's the thing I wish someone had shown me on day one. It freezes the status bar into whatever state you tell it — set time, full bars, full battery, no notifications — with no root and no design edits.
You drive it over adb. First you allow demo mode once, then enter it:
`adb shell settings put global sysui_demo_allowed 1` `adb shell am broadcast -a com.android.systemui.demo -e command enter`
Then set the pieces. A clean clock time, full mobile and wifi, a full battery that isn't showing the charging bolt, and notifications hidden:
`adb shell am broadcast -a com.android.systemui.demo -e command clock -e hhmm 0900` `adb shell am broadcast -a com.android.systemui.demo -e command network -e mobile show -e level 4 -e datatype false -e wifi show -e level 4` `adb shell am broadcast -a com.android.systemui.demo -e command battery -e plugged false -e level 100` `adb shell am broadcast -a com.android.systemui.demo -e command notifications -e visible false`
Capture your screenshots while demo mode is on, then exit so the phone goes back to normal:
`adb shell am broadcast -a com.android.systemui.demo -e command exit`
Two honest caveats. Demo mode is rock-solid on physical devices, but I've hit emulators (a recent Pixel API 36 image, for one) where it just doesn't take — the status bar ignores the broadcast. If that happens, capture on a real phone, or fall back to a helper like the old CleanStatusBar overlay. Google documents the full command set in the AOSP System UI demo mode reference if you want every flag.
Once you've got a clean bar, the rest is simple: put the app on the exact screen you want to show, and grab it at full resolution.
Do you actually need a physical iPhone for iOS shots?
No, and I stopped using one years ago. The iOS Simulator that ships with Xcode is the easier path, because Apple already sets the simulator's status bar to the marketing state — 9:41 clock, full signal, full battery, no clutter. You boot the device size you need, get your app to the right screen, and capture.
The quickest capture is right in the Simulator menu (Device → Screenshot, or ⌘S), which drops a correctly-sized PNG on your desktop. If you want to force specific status-bar values — a particular time, full cellular, a hidden carrier — the command-line override handles it:
`xcrun simctl status_bar booted override --time 9:41 --batteryState charged --batteryLevel 100 --cellularBars 4 --wifiBars 3`
Then capture from the terminal if you're scripting a whole set:
`xcrun simctl io booted screenshot shot.png`
You can absolutely use a real iPhone instead — some apps only look right on device — but then you're stuck setting Do Not Disturb, charging to 100%, and you still can't easily pin the clock to 9:41. The Simulator hands you all of that for free.
The one rule that matters either way: capture at the exact display sizes the store asks for. As of 2026 the required iPhone sets are the 6.9-inch and 6.5-inch displays, plus the 13-inch iPad if your app runs on iPad. Apple lists the precise pixel dimensions in its screenshot specifications, and both the Simulator and a matching physical device produce those sizes natively — no scaling, no guesswork.
How do you keep the capture lossless and correctly sized?
A clean status bar doesn't help if you wreck the file afterward. This is where I've watched good captures die.
Save as PNG, straight from the device or simulator. Don't screenshot a screenshot, don't push it through a lossy chat app, and don't ever upscale a small capture to hit a bigger required size — the stores reject stretched images, and even when they don't, a blown-up screenshot looks soft next to a native one. Capture at the target resolution from the start.
Keep a master. I save the highest-resolution clean capture of each screen as my source of truth, then downscale from that when a smaller size is needed. Downscaling stays sharp; upscaling never does. Every store wants its own exact dimensions, and it pays to have them written down — I keep every current store dimension in one place so the capture step is a lookup instead of a research project.
The captured PNG is an ingredient, not the finished dish. It's a clean, bare screen — no frame, no headline, no background. That's exactly what you want at this stage, because the design work comes next and it's far easier on a clean source. When I'm ready to turn a stack of raw captures into a finished set, I drop them into the PlayMockUp studio and add the frame, caption, and background there in a couple of minutes per screen.
What happens after you've got a clean capture?
The clean screenshot is step one of maybe four, so don't stop here or you'll ship bare, contextless screens that convert worse than they should.
Frame it. A raw screen floating on white reads as unfinished; the same screen inside a phone frame reads as a product. I pull the matching shell from the device frame library so the frame is the right model and the right store size, and every screenshot in the set uses the same one for consistency.
Add the caption. Bare screenshots make the viewer guess what they're looking at; a short benefit headline on each frame does the selling. That's a craft on its own, and I've written up what actually moves conversion in how to make app screenshots that get downloads.
Keep the status bar identical across the entire set. If frame one shows 9:41 with full bars and frame three shows a 62% battery because you captured it on a different day, the set looks stitched together. Capture them all in the same demo-mode session, or set the same simulator overrides, so the eight screens feel like one designed sequence rather than eight separate phone photos.
The screenshots you capture today will represent your app in every store listing, pitch deck, and social post for months. Spending an extra ten minutes getting them right — clean status bars, consistent data, proper device framing — pays for itself many times over.
Frequently asked questions
Why do App Store screenshots always show the time 9:41?
It's a marketing convention Apple started at the original iPhone reveal in 2007, and it's appeared across Apple's product shots ever since. A 9:41 clock now reads as a polished product photo rather than a random phone snapshot. The iOS Simulator sets its status bar to that state automatically, so you get the 9:41 clock, full signal, and full battery without doing anything.
Can I use emulator or simulator screenshots for the app stores?
Yes. Both Google Play and the App Store accept simulator and emulator captures as long as they're at the exact required pixel dimensions. The simulator is often the better choice because its status bar is already clean and correctly set, which saves you the fiddling you'd do on a real device.
How do I get a clean status bar on Android for screenshots?
Turn on SysUI demo mode over adb — it freezes the clock, battery, and signal into a tidy state and hides notifications, with no root needed. Capture your screens while it's on, then exit demo mode. Once the raw shots are clean, add the frame and caption in a browser tool like [the PlayMockUp studio](/create) instead of editing the status bar by hand.
Do I need to root my phone to clean up the status bar?
No. Android's demo mode runs through adb and standard developer options, so no root or jailbreak is involved. You enable USB debugging, allow demo mode once, and send the commands — your phone returns to normal the moment you exit.
What resolution should I capture app screenshots at?
Capture at the exact device size each store requires, never smaller and then upscaled. For iOS in 2026 that means the 6.9-inch and 6.5-inch iPhone sizes plus the 13-inch iPad if you support it; Android has its own set. Grab the largest clean version as a master and downscale from there so nothing ever gets stretched.
Should the status bar even be visible in my screenshots?
It depends on your design. Plenty of framed screenshots crop or overlay the status bar entirely, and that's fine. But when it is visible, it has to be clean and identical across every screen in the set, or the inconsistency makes the whole listing look sloppy.
Build the mockup in your browser.
Drop a screenshot into a real device frame and export at the exact store size — free, no signup.